Loading cart contents...
View Cart Checkout
Cart subtotal:

Heat Transfer, Self-Adhesive Vinyl and DTF FAQ’s

We understand you may have more than a few questions about DTF, heat transfer, or self-adhesive vinyl and how everything works! Therefore, let us save you some time and effort by answering the most popular questions our team is asked.

Chameleon Blue Blue HTV

Heat transfer vinyl, or HTV, is a type of film used to print custom designs, lettering, and numbers onto different fabrics. It is commonly used to create sports kits, party wear, and apparel for private businesses. Additionally, printable HTV is easy to print onto, cut, and press.

Iron-on films are generally available as cuts from a larger roll or in small rolls. Vinyl pressing, which is excellent for producing unique promotional clothing and designs, features an adhesive backing. This adhesive backing allows for easy cutting and weeding in preparation for heat transfer.

Moreover, you can use vinyl material with specialist printing and cutting machines, and you can press and print using a household iron or a heat press. Popular cutting machines include the Cricut Maker, Cricut Joy, Cricut Explore, Brother ScanNCut, Silhouette Cameo, and Silhouette Portrait.

HTV has a glossy side, known as the carrier sheet, which covers the vinyl itself. The other side, which is matte, is the cuttable, adhesive side. It is important to remember this distinction when cutting out your design. Please note that there may be some exceptions to this general rule.

Generally, we provide iron-on films as cuts from a larger roll or in small rolls. Vinyl pressing is excellent for producing unique promotional clothing and designs because it is backed by adhesive. This backing allows it to be easily cut and weeded in preparation for heat transfer.

Specifically, we offer 20x25cm sheets, 30x50cm mini rolls, and 50cm x 1m large sheets. Additionally, the continuous length of sheets with a width of 50cm can extend up to 25m.

Yes – both are exactly the same, however, some people use different terminology.

There are two parts to HTV, which are the carrier sheet and the vinyl itself.  They are initially bound together, but during the heating process and transfer, they will peel apart.

For smaller designs, you can use an everyday household iron to heat and press.

For larger or more complex designs, however, you should always use a heat press.

Before you start HTV printing for the first time, you may need the following tools and supplies:

• Garments you want to print on
• Weeding tools
• A heat press or a household iron
• A piece of fabric or Teflon to protect your design during the transfer process
• A cutting machine
• A transfer vinyl paper/ application tape of your choice or any from our shop
• Compatible cutting machine or plotter. The most popular ones are Cricut Maker 3, Brother ScanNCut DX 1000, Silhouette Cameo 4, Cricut Explorer 3, Cricut Maker, Cricut Joy, Cricut Explore Air 2, Silhouette Portrait 3, Gemini GEM-M-GLO, etc. Professional vinyl cutters like Roland plotters are built to handle many large projects.
• A PC or Mac compatible with your printer and cutter

You may also wish to make use of specialist illustration software which you can use to print your custom designs.  You may already be more than prepared!  You simply need to choose the right iron-on transfer film/ vinyl for your project.

All heat transfer vinyl is great for t-shirts because it comes with an adhesive that activates with heat. You will not be able to see or feel the glue.

However, once you warm it up, it will react and easily sink into your chosen fabric. This type of vinyl and adhesive is great for most fabrics because it can easily adhere to clothing without the risk of tearing, splitting, or losing the design. There are some exceptions, for example, knitted or coated fabric materials for which this vinyl is not suitable.

You just need to make sure you follow the correct instructions to get the best results!

We encourage you to print and cut test pieces before the larger production of printed garments.

HTV / transfer vinyl has two distinct sides, and you should always place its glossy side down for printing.  The matte side should be facing up.  The glossy side is sometimes called the ‘carrier’, and it is responsible for aligning the vinyl and adhesive.

* Please note that there may be some exceptions- peel back the corner of the film to make sure.

Generally, a heat press is advised for all t-shirt vinyl.  However, it can depend on the size and complexity of the design you wish to use or print.  You may be able to use a simple household iron if your design or lettering can fit underneath.  If not, however, you will likely need to consider investing in a heat press machine.

A heat press can be an amazing asset to regular vinyl printing and design pressing.  It is generally advised that you should purchase one if you are to use heat transfer sheets regularly, or if you are likely to be working with larger designs more often than simple logos.

Using a heat press is recommended as it is crucial that you will need to apply equal pressure across your design and vinyl sheet.  Failure to apply equal pressure throughout may result in results that aren’t what you expect!  As always, we do recommend that you consider running a test print and press before you oversee a larger production run.

This can depend on the type of textile films you are using, and the temperature, however, an even press of around 10-15 seconds is normally advisable.

In some cases, materials can be tricky and the vinyl doesn’t stick because each heat transfer vinyl type and material together work differently.

As a general rule, we recommend doing a testing cut and press on any designs you print to ensure you find the best process for the results you desire.

Remember that the pressure timing we provide are only a guide. Using these as a place to start when finding the best settings for your heat press.

Yes. Whether you are using an iron or another type of press, you should always have a protective sheet in place to cover your design.

When you are using a simple domestic iron, you can use something as straightforward as a cloth, towel or even baking paper.

If you are using a heat press or something more advanced, you should consider using a protective Teflon sheet or something more rigid.

A tea towel or cloth, however, may generally provide you with the protection you need.

This is a common concern for anyone starting out with heat transfer vinyl and with transferring designs to fabric. It’s a legitimate one.
The best advice we can give with regard to avoiding transfer burning is to consider applying a test press before you do transfer any logos or writing for real.

Beyond this, it is always good practice to use a lower temperature than you might start with.  This way, you can make sure you are under-heating your design as opposed to over-heating it.

Another good strategy to use to avoid spoiling or burning is to move around your iron slowly if you are using one.

A heat press will be able to support you with overall pressure that will minimize burning.  It is another great reason to invest in a professional heat press, especially if you plan to print and press designs on a regular basis!

A pressing pillow is a tool that can be used if you are printing designs onto complex materials or items of clothing which require a little more care.  These are foam-filled pillows that are coated in Teflon and are therefore perfect for iron-on or heat transfer.

They will be able to help you transfer your designs with maximum protection and distribute pressure more evenly when applying heat transfer vinyl to a surface that is bulky and challenging to press onto. If you are planning to print designs and lettering on that type of product in the future, you should certainly consider investing in a pressing pillow.

It’s not necessary to pre-wash shirts before applying HTV. However, we do recommend pre-pressing the garment for 1-5 seconds before applying an iron-on transfer. Another tip is recommended that you pre-shrink the fabric as much as possible.  This means your t-shirts and other garments will be ready for an even pressing with vinyl for the best results.  100% cotton products, particularly, respond well to pre-shrinking.

Make sure that you DO NOT use fabric softeners on garments before you use heat transfer vinyl.  Heat press vinyl may not be effective on clothing or material that has been exposed to such detergents. This means a straightforward wash – perhaps even just with warm water in a basin or in a washing machine – will be enough in terms of preparation required.

Good heat press vinyl and vinyl printing will endure years and years of use.  While poor quality or even cheap vinyl may be subject to scratching, flaking, and peeling through regular use and washing.

The vinyl products we supply withstand regular wear and tear and regular washing.  In many cases, iron-on transfers can last longer than many garment materials!

To be able to prolong the life of your vinyl or iron-on transfer design, you should always take extra care when ironing and washing your garments.  Improper or hurried ironing techniques may lead to damage or faster deterioration of your artwork.

You must also NEVER use garments with heat press vinyl in a dryer – and you should always turn your clothing inside out and wash on cold to mid-range heat (40˚C at most).  These are good steps to take to ensure that your garments withstand years of use and enjoyment.

If for some reason HTV transfer is slightly peeled off after washing then you can heat press or iron it over again and it will stick back. Don’t forget to use a protective sheet.

Iron-on vinyl transfer products work best on 100% cotton fabrics, but can also be used on simple polyester.  As a natural fiber, cotton is perfect for allowing t-shirt vinyl to easily adhere and remain for use after use and wash after wash.

Cotton and polyester blends will also withstand heat and will work well with heat press vinyl, which means you may even be able to get really creative and start printing on complex garments and apparel such as caps and shoes!

Some polyester, however, may not respond well to some heat products.  The vast majority of our heat transfer vinyl is designed and produced to adhere to such material, however, providing you set your heat press to no more than 270˚F / 130˚C, you will run no risk of melting the fabric.

As a general rule, we do recommend that you consider running a test print and press before you oversee a larger production run.

Synthetic fabrics are not recommended for use with iron-on films. This means materials such as nylon, acrylic, and leather should be avoided.  Any man-made or synthetic garments, generally, will risk melting under heat pressure, unless you use HTV, especially for this purpose.

Avoid using HTV on anything such as paper, plastic, lace, or satin as they will not be able to withstand the heat.

We do not recommend using heat transfer vinyl onto knitted garments and materials with an uneven or rough surface.

As a general rule, we do recommend that you consider running a test print and press before you oversee a large production run.

Do not be afraid as printed garment care is very simple!

Some tips to follow:

  • you should always avoid washing any garments you have used printable HTV vinyl on for up to 24 hours after application.
  • As you would normally, pay attention to washing instructions on the garment involved and avoid washing at temperatures higher than 40˚C.
  • You will be able to wash garments in a standard machine, too, just as long as you make sure they are turned inside-out before you put them in!
  • Gentle cycles are advised to be best, which means you should avoid any special cycles or rinses if you can help it.
  • When ironing a t-shirt or any decorated fabric use a Teflon sheet or any protective material to avoid ruining the HTV design.

What temperature to use may vary depending on the fabric you are using, as well as the type of transfer film.

Natural fibers and materials such as cotton will be able to withstand firm pressure with temperatures of 320˚F or 160˚C.  However, you will need to be careful with polyester, as it is at greater risk of getting damaged at higher heat.

Heat transfer vinyl should be applied to polyester at heats no hotter than 270˚F or 130˚C.  While the fabric does have a higher boiling point, this is the optimum temperature to use for the best results.

As a general rule, we recommend testing press any designs you print to ensure you find the best rhythm and process for the results you desire.

It’s recommended to avoid weeding the design until you start ironing or heating it.

It may be a good idea to roll up or cover everything you’ve printed with a Teflon sheet or a simple material like parchment/ baking paper for easy storage, transport, or giving your stickers as gifts. This will allow you to maintain the appearance and construction of your design.

It doesn’t say that clothing embellishments or designs have to be used right away!

Generally, any HTV with removable adhesive or Easy-Weed technology will be ideal for use with a Cricut or any other brand of cutting machine.

All of our HTV products can be used with a wide range of heat presses, printing equipment, and cutting tools. This includes some of our specialty products like glow-in-the-dark HTV and metallic heat transfer vinyl! The key is finding the right settings on your device.

As a general rule, we recommend doing a test print for each type of vinyl to ensure that the cutter is set to the best and correct settings to get the results you want.

For HTV you only need to cut the actual vinyl layer, not the carrier sheet.

Test Cut – cutting heat transfer vinyl at the wrong settings can lead to a lot of frustration when you need to weed it, and possibly even waste material. The cut can also be too deep, resulting in the HTV carrier sheet being cut in addition to the vinyl, which can make weeding difficult and sometimes impossible, or vice versa, there has not been enough pressure and the design has not cut out completely.

It’s important to find a setting that cuts your vinyl just enough to cut the material and leave the carrier sheet intact. This is where the test cut comes into play. Both the inside and outside of your design should be easily separated from the rest of the design and the base.

Always make sure you mirror your design in your software.

Opal Self adhesive vinyl

Self-adhesive vinyl is exactly what it says it is. SAV is a thin, flexible material with a pressure-sensitive adhesive that can be cut into any design and applied to all types of smooth, hard surfaces.

SAV Shimmer Dots self adhesive vinyl

Step by step:

  • Cut with the cloured vinyl side facing up and the paper liner on the cutting mat
  • Weed the excess vinyl
  • Apply a transfer/ application tape over your sticker and rub lightly with a squeegee
  • Apply the prepared sticker onto the clean surface and rub it with a squeegee (expel bubbles)
  • Slowly remove the application tape and rub it over with a squeegee again

You should always perform a test cut prior to any wider production run.


Tools:

  • a damp cloth for cleaning surfaces
  • a spray bottle with soap water ( very light) if your sticker/self-adhesive vinyl transfer is big in size.
  • rubber squeegee
  • craft knife/ weeding knife

DTF

DTF direct to film transfer

DTF (Direct to Film) transfer is a printing process used to create custom designs on various fabrics and materials. It involves printing a design onto a special film using water-based pigment inks. Once printed, a hot melt powder adhesive is applied to the wet ink on the film. This powder ensures that the design adheres to the fabric during the transfer process.

DTF transfers are known for their vibrant colors, durability, and ability to adhere to a wide range of fabrics, including cotton, polyester, blends, and more. This method offers several advantages over traditional screen printing and Direct to Garment (DTG) printing, such as not requiring pretreatment of the fabric and being able to print on both light and dark garments without significant color loss.

application instruction DTF

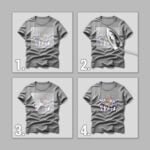
Achieving a flawless transfer onto your T-shirt is easy with these step-by-step instructions:

  1. Prepare the T-shirt: Lay your T-shirt on a flat surface and smooth out any wrinkles. If necessary, pre-press the shirt to remove moisture and wrinkles.
  2. Place the Design Transfer: Carefully position the Custom DTF Transfer with the printed design facing up onto the T-shirt in your desired location.
  3. Add a Protective Layer: Cover the transfer with a sheet of parchment paper or Teflon sheet. This layer safeguards both the transfer and your heat press or iron.
  4. Adjust the Temperature: If using an iron, apply firm to medium pressure and set it to a medium temperature (approx 155C). Test a small area first to ensure it’s safe for the fabric.
  5. Press the Transfer: Glide the iron smoothly in a circular motion, ensuring the entire transfer area is covered for at least 15-20 seconds to promote proper adherence.
  6. Allow to Cool: After pressing, lift the heat source and let the transfer cool for a few seconds.
  7. Peel Off the Backing: Gently peel off the backing paper while the transfer is still warm. If it resists, allow it to cool further before attempting to peel.
  8. Inspect Adherence: Once completely cooled, examine the design to confirm it has adhered properly. If any areas are loose, repeat the heating process.
  9. Repeat the heating process: The additional heat and pressure ensure that the ink bonds more securely with the fibers, reducing the chances of peeling or cracking over time.
  10. Final Check: Once fully cooled, ensure the Custom DTF Transfer is securely adhered to the T-shirt.

My Question Isn’t Here – What Should I Do?

If you have any other specific queries or general questions about cuttable films, printable HTV, SAV, or any other heat transfer vinyl in general, our team is always ready to help you.

Simply call us directly at +44 7471598378 or email us at info@a78.co.uk at your convenience.

Alternatively, we are also available to help you on social media, too!

Crop Image